
Since this blog’s creation, I’ve tried to think of content that will appeal to a wide range of readers, from a beginner trying to learn more about lolita fashion to a veteran who might appreciate a more philosphical, tongue in cheek post about the best headwear for lolita (it’s berets, in case you didn’t know).
Recent events have forced me to reconsider my position. It seems I’ve been neglecting the fundamentals of lolita. A shocking number of people I follow, like, commented on, or shared a recent post by Instagram user Meltycreamdespair. The post in question is a meme with a photo of Griffin McElroy (with a bow on his head, because this is lolita meme account after all), holding up a sheet of paper with a modified quote from the show Parks and Recreation, which reads, “I don’t know how to tie my waist ties, and at this point I’m too afraid to ask.”
View this post on Instagram
On it’s face, this isn’t a completely crazy thought because tying a bow backwards on yourself is kind of tricky. However. the comments revealed some lolitas who don’t know how to tie a regular bow.
I’ll be honest. I never thought I’d be in this position, but let’s do it: here’s a tutorial for how to tie a bow.
The principle for the perfect bow is the same as making a square knot – “Right over left, tie. Left over right, tie.”
How to tie a bow
Please note, because I took this video on my front facing camera, it is flipped. However, my instructions are correct. Right over left, left over right.
View this post on Instagram
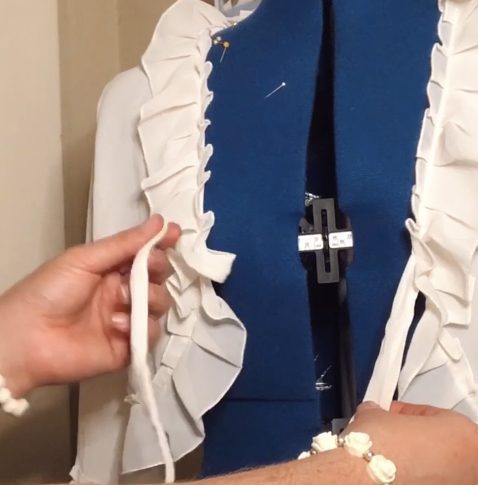
- Hold your ribbon with one side in each hand. The two sides should be equal.

- Take the right side of the ribbon and cross it over the top of the left side of the ribbon. Look back under and tighten. You should have a simple tie in your ribbon.
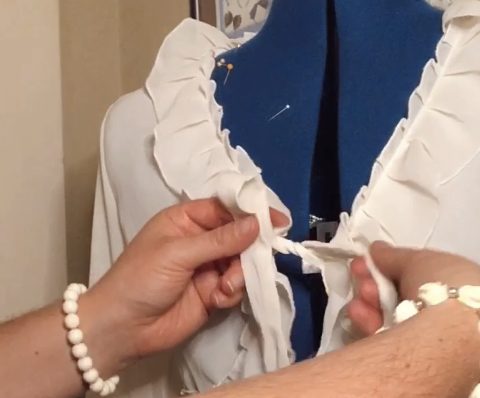
- Take the two ends of your ribbon in your hands again. Make a loop with your right hand. Wrap the left side over the top of the loop, forming a loop with the left side as you thread it through the center.
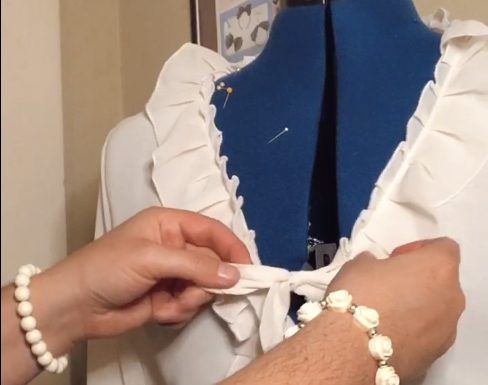
- Adjust your loops and tails as needed.
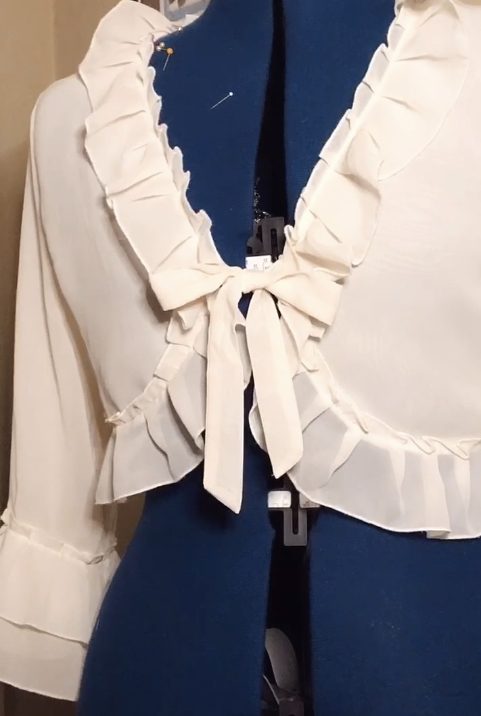
- If you’ve done everything correctly, you should have a ribbon with a perfect square knot in the center, loops coming out the top and tails coming out the bottom.

Now, this is obviously very simple to explain, but lolita fashion does present a few complications.
Trap #1: Single sided waist ties
Waist ties are sometimes single sided, which means you have to pay special attention to which direction your ribbon is facing at every step in the process. The trick is to make sure that when you make the loop with the left side of the ribbon, you make sure that the loop has the ribbon facing the correct way.
Trap #2: Back of the dress
Waist ties are often on the back of a dress, which makes it tricky to see what you’re doing and easy to make your bow upside down. Honestly though, my favorite part about being around other lolitas is helping others with their waist ties. Now all you have to do is show your friends this post. You’ll be bow experts in no time. If you don’t have anyone to help you, many waist ties are detachable, so you can tie your bow wear you can see it, remove them from the dress, and put them back on, already tied.
Hope you bow-untied-gremlines learned something today. Don’t say I never did anything for you!
If you found this tutorial helpful, please consider supporting me on Kofi.